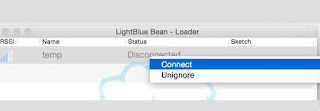
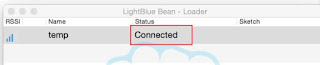
In this blog I will write about how to configure and setup the Bean Punchthrough micro controller and blink a LED for the first time.The Punch through is a simple micro controller with an ATmega chip embedded on to a chipset and a built in proto board.It runs on a 3V battery and connects through Bluetooth and is perfect for prototyping or for small projects. Programming wireless makes it convenient to program thru any device that has blue tooth enabled like a Mac, PC, laptop, iPhone or a smart phone.Here I will tell how to enable the micro controller and start with a sample LightBlueBean example which will enable you to blink the LEDs.Things you need:- Bean - Arduino 1.6.7 sketch installed by downloading from Arduino site.https://www.arduino.cc/en/Main/Software- Bean Loader from their PunchThrough website.https://punchthrough.com/beanFirst start off with the Bean and insert the 3V coin battery and see that it is powered up.Next, connect to it by right clicking the icon and Connect, You should see it in connected state.

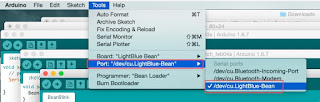
 Next, follow the instructions as mentioned in this portal for launch of Bean loader and Associate it to Arduino.Launch Arduino, and select these settings as shown.
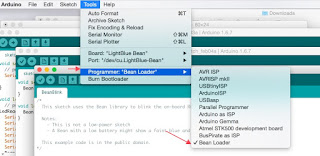
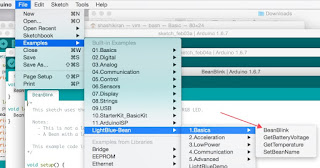
 Next, select the BeanBlink example and go to Arduino and click on Verify, followed by Upload.
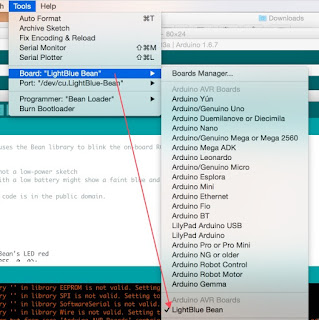
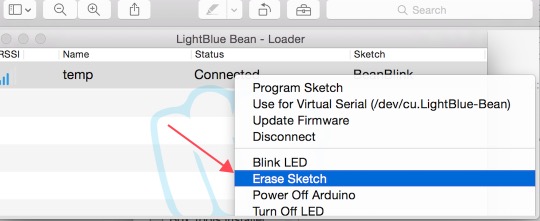
 Open the Bean Loader and right click on the connected, and Program sketch.
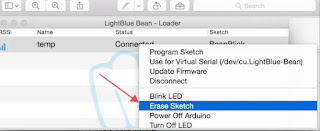
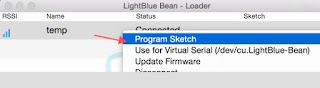 Once it successful in Uploading - the LEDs on the Bean should turn to Red, Blue and Green and continue until it is stopped by Right Click Connect-> Erase Sketch
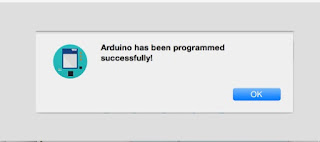
 Troubleshooting tips:If the Bean does not connect from the Bean Loader, then remove the battery and retry inserting and connect the device from the Bean loader.If the Upload of sketch from Arduino does not happen then retry (I had to try it like 3 times before I got a successful Upload )Good luck on your tries and share your experiences with this device below.
This blog is about how to enable a single LED on the Bean using the Bean Loader.To read more about the Bean : https://punchthrough.com/bean/You require a) Arduino Sketch and the Blue Bean Loader installed on your laptop. First,Open Arduino -> Newand enter this.void setup() {
Bean.setLed(255, 255, 255);
}
void loop() {
Bean.sleep(1000);
}Check this first that the code executes by a)Verify b) UploadTools -Board - Light Blue BoardPort -> Light Blue Board.Programmer-> Bean LoaderNext, Open the Bean Loader and click on Connect-> UploadOnce the Upload is successful - the LED should light up on the bean.Code was from https://punchthrough.com/bean/reference setLed()For additional information : https://punchthrough.com/bean/
A few steps that one has to do if they want to change the default white background when creating pages.1. Login as the administrator.2. Go to Console Preferences3. Choose the appropriate design for the background ( Create a type of console and assign the tasks if one is not there )
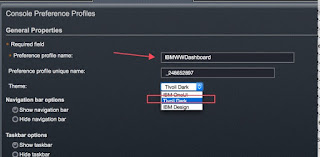 Save it.Now create other pages - and they will all have the same page background - based on users selected for their background.