Monday, November 2, 2015

My first Bluemix Dedicated login access snapshots.

Bluemix Dedicated is an IBM offering on trial basis as of now .
This has several starter boiler plates for starter projects and ready to be deployed.


One has to make a request for an organization, internally before logging in.

Here are some snapshots of it.

I had to create a new name for the organization ( see snap) to get started.


Click on LOG IN on  upper right to get started.


Shashi Kiran

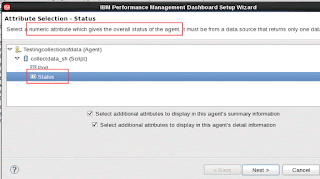
KQZ8424E Attribute giving Primary status must have values for at least two different severity levels. Location: attribute

This message shows up in Agent Builder 6.3.2.
Means - there is a certain attribute in the agent that you are building - which has severity levels not configured right.


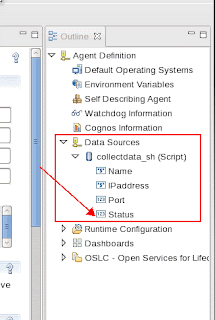
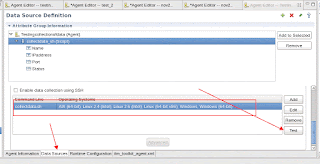
In the Agent Builder: Open the Data Sources.


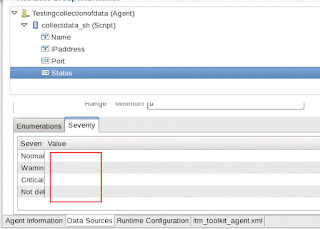
You willl notice that the severity for Status is not defined.


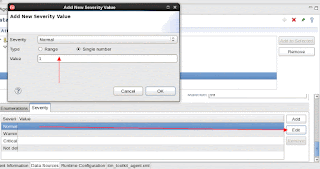
Click on Edit ,and populate it with some severity levels ( in my case I have chosen Single Number , yours could vary.
'


Edit and Save it - for the error to go away.


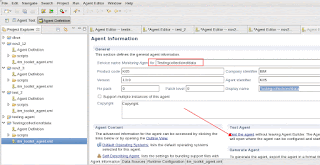
Creating a Agent from the agent builder to run a script on a Linux server.

Best Practices for creating a new Agent on the agent Builder.

This was tested on Agent Builder V6.3.2.

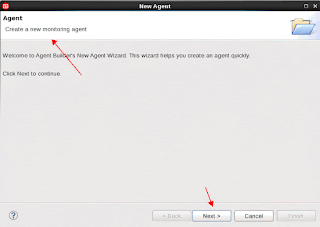
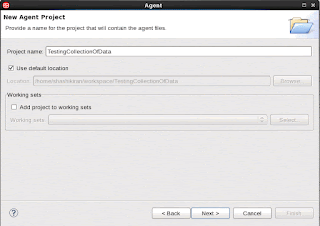
File -> New -> Agent


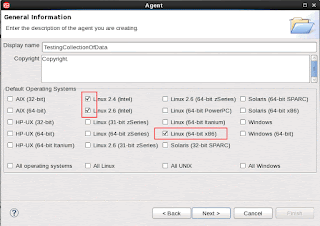
Choose O.S


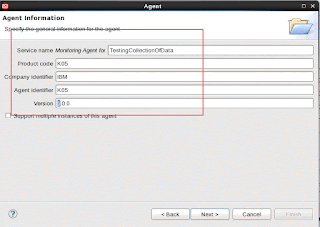
Accept Defaults:


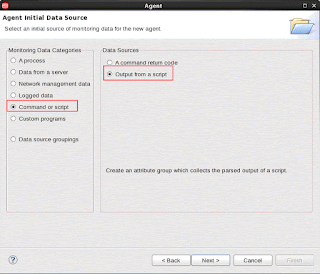
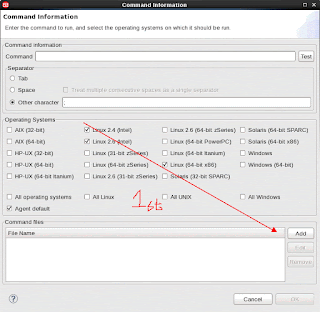
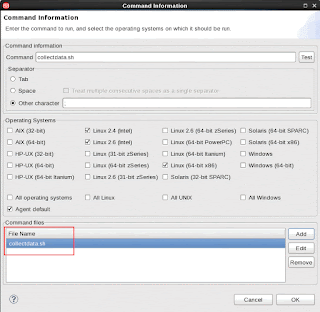
Choose the script you want to execute on your local Linux laptop server .
In my case it is a simple script :

[oc0650888602 ~]$ cat collectdata.sh
#!/bin/bash
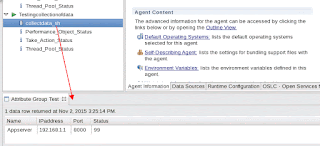
echo "Appserver;192.168.1.1;8000;99"


The others will get autofilled.

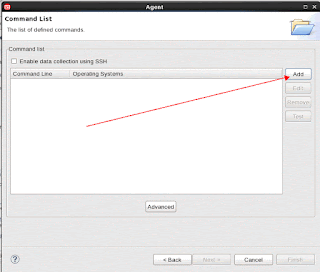
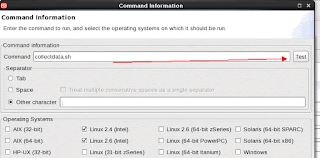
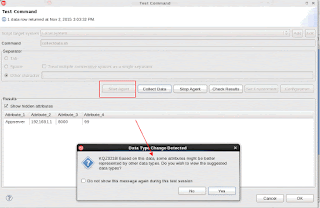
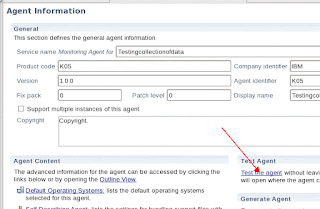
Click on Test on the upper right side.


Click on Test -> and Start Agent,
The results should appear as shown.


There is some informational self explanatory text -read it.

This tells that I have 4 attributes in the external file defined and 2 of them were strings ( while in fact the Agent Builder  found it to be numerics - this has to be corrected )


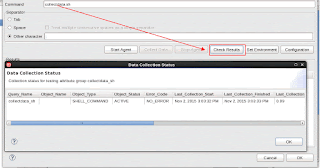
Click on Check Results and a popup should appear.


Click OK.
It should get you back to the main AB build panel.
Now, Click Next,
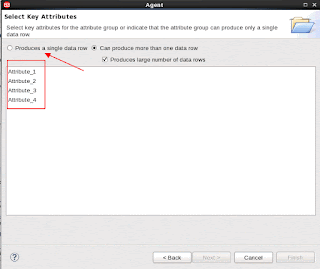
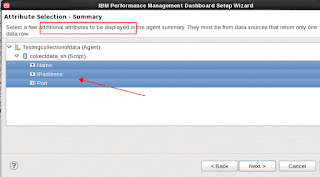
It goes back to the data sources which has the 4 automatically configured attributes listed by default names.

Select "Produces a single data row."


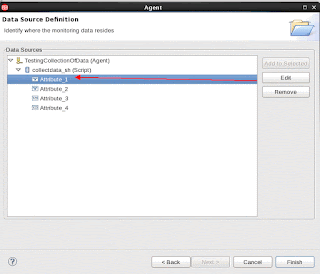
Change the data sources names.


At this point :

Check the following :

- Did you run a test and check that the command is executing both command line and from the AB correctly.
- Go to Data Sources -> go to command Line panel at the bottom - select the script and then the Test button gets activated.

Click on Test and then see it works.

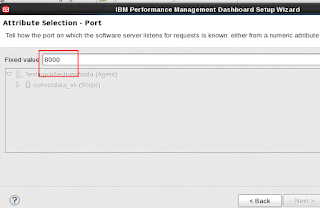
In my case - I have set the script to output based on semicolon as separators.
the script returns it based on semicolons and like wise the AB is configured to chop each section based on semicolons too.


- Always work in the Agent definition tab, and not in the Agent Test tab.


- Is OSLC definitions defined ?


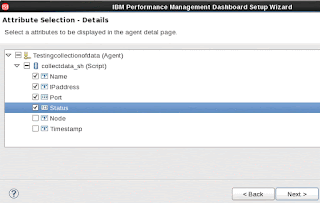
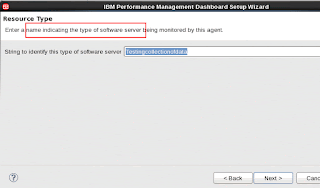
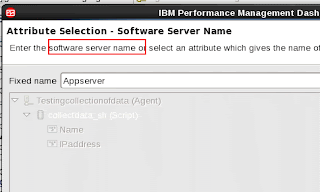
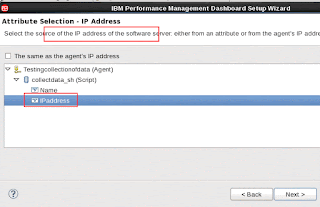
These are my values - Yours might differ.
Click Finish.

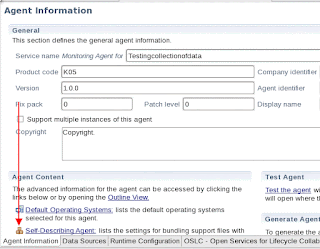
Go back to the Agent Information panel -


Check that there are no errors in the "Problems " section in the Eclipse IDE.


A new tab in Agent section should open up.

Click on the Green right arrow icon to start the agent .


This now shows the correct results when the script was run on the local Linux server.


Shashi Kiran

Friday, October 23, 2015

Configuring difficulties while using aws iot create-thing --thing-name <>

I cannot register a device ( like a raspberry Pi ) using the newly created AWS IoThings

[User@oc0650888602 ~]$ aws iot create-thing --thing-name  Raspy

A client error (SubscriptionRequiredException) occurred when calling the CreateThing operation: The AWS Access Key Id needs a subscription for the service

Posting it here until I can find a resolution !

Shashi Kiran

Wednesday, October 21, 2015

My first AWS Beta IoT - device creation failure.

Created an Amazon AWS IoT Beta Account and got this failure message  when I brought up the Launch Management Console ! Trying to decipher it ! :)


Monday, September 14, 2015

Controlling lights using Raspberry Pi, and relays thru Bluemix IoTF.


With the Lord's festival (remover of obstacles ) coming up, I thought of how to use Bluemix's IoTF  for this occasion, so that I can demonstrate the ability of Bluemix , Raspberry Pi to control some standard lights controlled by a 240V power outlet.

My Objectives were
- Use Relays and control lighting of an idol of Lord Ganesha from Bluemix IoTF.
- Demonstrate how I can publish / subscribe commands from a device ( Raspberry Pi) to Bluemix IoTF, and likewise Pub/Sub from Bluemix to my app ( i.e my laptop )
i.e Showcase a command from the application ( i.e my laptop ) sending a "enable lights " to Bluemix IoTF,
- Simulate a temperature sensor sitting on my device and sending the data across to Bluemix IoTF and if temperature was above a certain threshold - turn the lights on, and turn off when temperature fell below threshold.
- Show how we can control the command to ON / OFF  from a web interface.
( at this point - I have not published my IP address to the general public,  so my web server runs local and one can access it by running http://127.0.0.1/get.html )


Here are some snapshots :


The code used was :
Client side on the device was a simple C Program - which subscribes to the IoTF and listens to any commands.

App side -i.e my laptop, was a Node.js which sends commands to turn on / off depending on instructions from Bluemix IoTF or the device.
In the below example, the application receives data from the IoTF and acts by sending some commands.

applicaton.on("deviceEvent", function (deviceType, deviceId, eventType, format, payload) {

    console.log("Device Event from :: "+deviceType+" : "+deviceId+" of event "+eventType+" with payload : "+payload);
    var json = JSON.parse(payload);
    console.log ("temperature is " +json.d.temp );

    if ( json.d.temp > 10) {
                console.log ("since temp is > 10, CRITICAL ");
                //payload = '{ "numOfTimes" : 1 }';
                //applicaton.publishDeviceCommand(deviceType, deviceId, "blink", "json",payload);

                payload ="critical";
                console.log ("sending payload " + payload );
                applicaton.publishDeviceCommand(deviceType, deviceId, "blink", "string",payload);

    } else {
                console.log ("since temp is < 10, SAFE");
                //payload = '{ "numOfTimes" : 0 }';
                //applicaton.publishDeviceCommand(deviceType, deviceId, "blink", "json",payload);

                payload = "safe"
                console.log ("sending payload " + payload );
                applicaton.publishDeviceCommand(deviceType, deviceId, "blink", "string",payload);


    }

Friday, September 11, 2015

Sending event notification from Facebook IoT Platform Parse.com to Raspberry Pi

Facebook has a IoT Platform called Parse - which acts like a foundation to receive and send events from various devices ( e.g Raspberry Pi and other hardware devices ), This platform can connect to Apps on desktops, mobile devices, etc and send events to devices.

Below is my experience on using this platform to push events to my Raspberry Pi from the Parse IoT Platform.

First I created a simple starter app called RPi and followed the procedure to install the necessary code on my device to connect to Facebook's  Parse platform.

Followed this link :
https://www.parse.com/apps/quickstart?app_id=rpiapp#embedded/raspberrypi

Sounded pretty quick and simple - however the sending of events from the device ( Raspberry Pi) to the Facebook's IoT Platform seems a bit challenging at time. - Working on it.

Here is a brief up of how to send events from Facebook's IoT to your Raspberry Pi.

Clicked on Test button on the parse.com page.


and on my Raspberry saw these events show up :


Sunday, September 6, 2015

Sample C Code to turn a LED On/Off on Raspberry Pi on GPIO Pin


This "C" code below will turn the LED on Pin 17, also known as  GPIO17, also known as GPIO GEN0/GPIO17, (6th pin on inside column from top - if you are holding RPi with the USB ports facing down )


This was tested on a Raspberry Pi Model B.
 
This is defined by the API call "wiringPiSetupGpio()" in the beginning of the code.

However, there is yet another API called "wiringPiSetup()", Here Pin 17 would mean +3V !! - so have to watch out !

Be Careful how you want to define your pin numbering, and use the appropriate API call before sending signals to the Pins on the RPi.

#include <wiringPi.h>
#include <stdio.h>
int main (void)
{
  if ( wiringPiSetupGpio () == -1 ){
        printf ("wiring failed - returning ! ");
        return 0;
  }
  pinMode (17, OUTPUT) ;
  for (;;)
  {
    digitalWrite (17, HIGH) ;
        delay (500) ;
    digitalWrite (17,  LOW) ;
        delay (500) ;
  }
  return 0 ;
}

Saturday, August 29, 2015

Snapshot of Sending commands from IoTF to RPI.

This is a snapshot of how one can send some basic commands from the NodeRed ( IoTF ) back to the device. Here I am sending some simple strings to the device ( in my case it is a Raspberry Pi ) The code on RPi, should sit and listen to incoming commands,by using a callback function.

Thursday, August 27, 2015

Simple node js code to receive commands from a Device over mqtt. ( App side )

A traditional publish / subscribe model for an IOT would mean that the Device ( in this case let's say a RPI ) is publishing some sensor data ( say a temperature from a furnace )
and sending it to IoT platform.  This is called the "Client"

At the other side - there is an app" end - where we have a C program, or Java or Python application which is sitting and listening to the PublishEvents from the device(s).


Below is a App end code in node.js - which connects to IoTF ( Internet of Things Foundation )  and prints whatever it received from the devices.


A sample  node.js code to receive events data published from the device (e.g : Raspberry Pi )


References :
http://iotf.readthedocs.org/en/latest/libraries/python_cli_for_apps.html#handling-events-from-devices


Run this on your laptop  ( or on the app end )
( npm install iotf _ if this complains that Iotf libraries are not installed ) 
 
==
var Client = require("ibmiotf").IotfApplication;

//read the config from the application.cfg
var config = Client.parseConfigFile('./iotf.cfg');

var application = new Client(config);

var deviceType = "iotdevice";
var deviceId = "b827eb984666"

application.connect();

application.on("connect", function () {


        setInterval(function function_name (argument) {
                payload = '{ "numOfTimes" : 23 }';

                application.publishDeviceCommand(deviceType, deviceId, "blink", "json",payload);

        }, 2000);

});


==
This will connect to IoTF and print data being published from the device(s) which are at remote places.

A sample :

[user@oc0650888602 nodetest]$ node app.js
[2015-08-27 18:24:10.268] [INFO] [default] - Connected to IoTF successfully
Device Event from :: iotdevice : b827eb984666 of event status with payload : {"d" : {"temp" : 16 }}
Device Event from :: iotdevice : b827eb984666 of event status with payload : {"d" : {"temp" : 5 }}


==
A sample  iotf.cfg  that is used is as shown:
org = 8ubmht
id = b827eb984666
auth-method = apikey
auth-key = a-8ubmht-httz8bouy6
auth-token = NNZrVxhQpZa90Jc*5J    


Sunday, August 16, 2015

Temperature and Humidity Sensor using DHT11 connected to Raspberry Pi.

Blog used to refer when building this project:

http://www.rpiblog.com/2012/11/interfacing-temperature-and-humidity.html


Items used in this project:

Raspberry Pi  Model B.

DHT11 Temperature sensor

10K Resistor -

Breadboard-  on which the Sensor was connected and 3 pins from it being used for connecting to Power, GND and the data pins.

Setup:

- Connected the first Pin of the DHT 11 to +5V  ( Pin 2 of RPi) ( seeing from the left of the DHT11 )

- Connected the last pin of the DHT11 to  GND ( Pin 39 of the RPi)

- Connected the 2nd pin i.e data ( from the left of the DHT11) to Pin 7, i.e GPIO4 of the RPi.
How to Compile source code:
-gcc -o sensor temp_rh_sensor.c -L/usr/local/lib -lwiringPi

A reference device - an independent device used to check that the DHT11 was reporting approximately same temperature.


^Cpi@raspberrypi ~/wiringPi $ sudo ./sensor
Interfacing Temperature and Humidity Sensor (DHT11) With Raspberry Pi
Invalid Data!!
Humidity = 58.0 % Temperature = 30.0 *C (86.0 *F)
Invalid Data!!
Humidity = 59.0 % Temperature = 30.0 *C (86.0 *F)