

The parts I needed were
- Raspberry pi Model B.
- 4 1.5 V DC batteries
- L293D Chip
- Breadboard
- Some wire, duct tape , and a magnifying glass to peer thru the maze of wires to connect the L293
- 5V DC motor
I used only 1 motor ( connected to the left side of the chip ) to see if I could get the motors running although this chip supports 2 Motors to be driven.
The link I used was :
http://www.rhydolabz.com/wiki/?p=11288
Raspberry was connected to my laptop via the USB port.
External power supply was from a battery holder .
The Pins I used on the Raspberry Pi wer
- Pin 16 (GPIO23) of Raspberry Pi is connected to L293D–Pin 7
- Pin 18 (GPIO24) of Raspberry Pi is connected to L293D–Pin 2
- Pin 22 (GPIO 25) of Raspberry Pi is connected to L293D–Pin 1
- Pin 2 (+5V) of RaspberryPi is connected to L293D Pin 16
- The battery +5V goes to pin 8 of the L293D
- The battery -ve goes to Pin 4 or Pin 5 of L293D.
Overall Chip set diagram and configuration to Raspberry Pi.

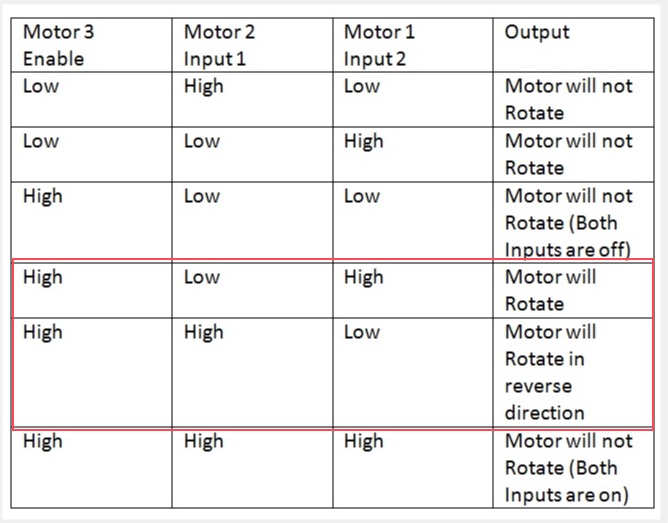
Chart to be used to understand the direction of the motor spin.
and it was accomplished in the code by using this..

This got the motor to spin forward for a bit and then backwards for a bit and finally stop.
No comments:
Post a Comment