Sunday, January 31, 2016

Controlling a DC geared motor using Raspberry Pi.


Shashi Kiran shared a post with you on Google+. Google+ makes sharing on the web more like sharing in real life. Learn more.
Join Google+

image not displayed

View or comment on Shashi Kiran's album »
You have received this message because Shashi Kiran shared it with kiranshashi.cygwin@blogger.com. Unsubscribe from these emails.
You can't reply to this email. View the post to add a comment.
Google Inc., 1600 Amphitheatre Pkwy, Mountain View, CA 94043 USA

Installing APM 8.1.2 on Linux server - snapshots.

This snap shows how to install the Application Performance Management 8.1.2 on a RHEL 6.7 server.

APM is a component where we can install the Monitoring agents, and this blog lists the snapshot of the results from running the installer.
FYI - for future reference.


The installer is :
ipm_apm_advanced_8.1.2.tar


[root@prcpcdhwwgh04 installers]# export SKIP_PRECHECK=1
[root@prcpcdhwwgh04 installers]# ./install.sh

Do you want to upgrade from an existing installation of the Performance Management server [ 1-yes or 2-no; "no" is default ]?

This script will install IBM Application Performance Management Advanced (8.1.2.0).

Do you want to continue [ 1-yes or 2-no; "yes" is default ]?

Do you want to change the default installation directory ( /opt/ibm ) [ 1-yes or 2-no; "no" is default ]?

Do you accept the license agreement(s) found in the /home/mesadmin/Downloads/installers/licenses/ipm_apm_advanced directory [ 1-accept or 2-decline ]? 1

License agreement was accepted, installation will proceed...

Do you want to change the default password for the administrator account [ 1-yes or 2-no; "no" is default ]?

Agent installation images must be configured to connect to this server. If you have downloaded the agent images to the same system as the server, you can configure the agent images now.

Do you want to configure the compressed (*.zip or *.tar) agent installation files now [ 1-yes or 2-no; "yes" is default ]?

Enter the path to the directory where you downloaded the compressed agent (and/or Hybrid Gateway) installation images (e.g. /opt/agents).
Enter the path or accept the default [/home/mesadmin/Downloads/installers]:

Enter the path to the directory where configured agent installation images can be stored.
Enter the path or accept the default [/opt/ibm/ccm/depot]:

Enter the IP address/hostname that should be used by agents to communicate with the server.
Enter the IP address/hostname or accept the default [10.77.156.184]:

Do you want to install the database or connect to an existing DB2? [ 1-install database or 2-connect to existing database; "1-install database" is default ]?

No further user input is required. The installation and configuration of components is now starting and may take up to one hour to complete.

Installing DB2. Please wait...

Installing the Performance Management server. Please wait...

Starting components of the Performance Management server...
.........................................................

...............

Configuring components of the Performance Management server...
     

All components are configured successfully.

Configuring agent installation images...
Agent installation images have been configured and are available in the following directory: /opt/ibm/ccm/depot.

The configuration of agent installation images can also be done manually.
To do this manual configuration, first create configuration packages by using the following script: /opt/ibm/ccm/make_configuration_packages.sh. Then, use the output packages from the first script and run the following one: /opt/ibm/ccm/configure_agent_images.sh.

Finalizing the installation...

The server size has been configured as 'extra_small' based on the number of CPUs, amount of memory and free disk space. To reconfigure the server size, run script /opt/ibm/ccm/server_size.sh with the desired size as a parameter. Valid sizes are: extra_small, small, medium.
Please review the documentation at http://ibm.biz/mon_docfor more information.
To begin using the product, copy the configured agent images to the systems running the applications you want to monitor and install the agents. Log in to the Performance Management console using https://10.77.156.184:9443and review the topics on the "Getting Started" page.


Sunday, January 24, 2016

Controlling a 5V DC motor with a Raspberry Pi Model B.

Here I will write about how I was able to get the DC motor energized by a Raspberry Pi, Model B as part of my hobby to get motors running using my IoT project.

The parts I needed were
- Raspberry pi Model B.
- 4 1.5 V DC batteries
- L293D Chip
- Breadboard
- Some wire, duct tape , and a magnifying glass to peer thru the maze of wires to connect the L293
- 5V DC motor

I used only 1 motor ( connected to the left side of the chip ) to see if I could get the motors running although this chip supports 2 Motors to be driven.

The link I used was :
http://www.rhydolabz.com/wiki/?p=11288

Raspberry was connected to my laptop via the USB port.
External power supply was from a battery holder .

The Pins I used on the Raspberry Pi wer
  • Pin 16 (GPIO23) of Raspberry Pi is connected to L293D–Pin 7
  • Pin 18 (GPIO24) of Raspberry Pi is connected to L293D–Pin 2
  •  
  • Pin 22 (GPIO 25) of Raspberry Pi is connected to L293D–Pin 1
  • Pin 2 (+5V) of RaspberryPi is connected to L293D Pin 16 
  •  The battery +5V goes to pin 8 of the L293D
  • The battery -ve goes to Pin 4 or Pin 5 of L293D.
The GND of the Raspberry (Pin 39) was connected to Pin 4, and Pin 5 of L293D as well as the GND of the 5V battery.

Overall Chip set diagram and configuration to Raspberry Pi.


Chart to be used to understand the direction of the motor spin.


and it was accomplished in the code by using this..


This got the motor to spin forward for a bit and then backwards for a bit and finally stop.

Friday, January 22, 2016

Checking Internal temperature on my Arduino Uno Processor.

Came across this good article to measure the temperature on the Arduino Uno.

http://www.theorycircuit.com/arduino-internal-temperature-sensor/

https://www.arduino.cc/en/Main/ArduinoBoardUno- reports teh chipset is ATmega328P.


First check that the Arduino IDE has the Serial Monitor in the interface.


Next,
Copy this code into Arduino IDE and open the Serial Monitor ,Verify and Upload and open the serial monitor -
You should see these messages indicating the internal temperature of the Micro Controller.


// Internal Temperature Sensor
// Example sketch for ATmega328 types.


voidsetup()
{
 
Serial.begin(9600);

 
Serial.println(F("Internal Temperature Sensor"));
}

voidloop()
{
 
// Show the temperature in degrees Celcius.
 
Serial.println(GetTemp(),1);
 
delay(1000);
}

doubleGetTemp(void)
{
 
unsignedintwADC;
 
doublet;

 
// The internal temperature has to be used
 
// with the internal reference of 1.1V.
 
// Channel 8 can not be selected with
 
// the analogRead function yet.

 
// Set the internal reference and mux.
 ADMUX
=(_BV(REFS1) |_BV(REFS0) |_BV(MUX3));
 ADCSRA
|=_BV(ADEN);  // enable the ADC

 
delay(20);            // wait for voltages to become stable.

 ADCSRA
|=_BV(ADSC);  // Start the ADC

 
// Detect end-of-conversion
 
while(bit_is_set(ADCSRA,ADSC));

 
// Reading register "ADCW" takes care of how to read ADCL and ADCH.
 wADC
=ADCW;

 
// The offset of 324.31 could be wrong. It is just an indication.
 t
=(wADC -324.31 ) /1.22;

 
// The returned temperature is in degrees Celcius.
 
return(t);
}


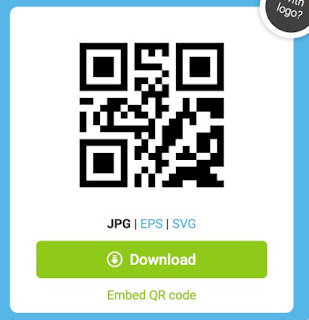
My QR code.


Creating my own QR code using text.

Amazing that this QR code is becoming popular these days - I was wondering how to generate an unique QR code for general use like banking, or create a QR code for one self and have it on my banking passbook or any other reference material that I can use a smartphone or some other device to read data without me entering all my data manually.

I found this site where I could create an unique QR Code with several parameters.

One of it is using Text" and I could enter my name or some unique Identification number and click and get a QR code.

So here goes.....
http://www.qr-code-generator.com/


Shashi Kiran


Tuesday, January 19, 2016

How to make a custom page in Tivoli DASH as default start up page.

This blog was to help anyone who wants to make one of the pages in Tivoli DASH they create as the launch page.

Typically - what happens when you install Tivoli DASH is that you are welcomed with a default Learn , Connect , Explore page.
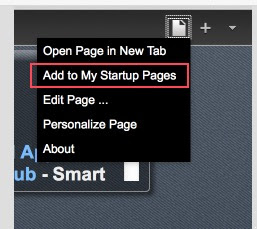
But if you are creating new pages and want to make that your launch page - follow the steps below:

Open the page that you want to make it the startup page in DASH.

Go to Edit mode, and Select "Add it to my Startup pages"

Logout and log back in - to see this page launch as soon as you login.

Had you not done this - then the default - Learn Connect Explore page would have been launched.


Friday, January 15, 2016

Configuring *correct USB port using CH340G for Arduino on Mac OS Yosemite. Part 2.

Some photos of how I debugged the chinese chip and installed the driver to render the USB Modem Port on Arduino Sketch and Upload the sketch (programs)

Link :
http://kiguino.moos.io/2014/12/31/how-to-use-arduino-nano-mini-pro-with-CH340G-on-mac-osx-yosemite.html
Some photos of my Micro controller, which tells me the chip type, and where it was made etc.

The culprit was the HD(M?) 340G which did not have the right driver on Mac Yosemite.


You would have to zoom the picture to find this out.

Putting a blog out here so that someone who does it later does not have to go thru the same  !
Took me more than 4 hrs to figure this out.


Controlling a LED from Arduino, from my Mac OS - Yosemite. Part I.

Apparently, this became a challenge as my Arduino Uno has a Chinese chip that was not having required drivers on Mac Yosemite.
So, the minute I installed Arduino and tried to upload, I could not see the required port.

For this - I had to first find the chip installed and having figured it out, installed the required drivers on Mac and restarted and got it working.

Below link is what helped me the most.
http://kiguino.moos.io/2014/12/31/how-to-use-arduino-nano-mini-pro-with-CH340G-on-mac-osx-yosemite.html

[attachment "Screen Shot 2016-01-15 at 1.02.41 PM.png" deleted by Shashi Kiran4/India/IBM] [attachment "Screen Shot 2016-01-15 at 10.58.47 AM.png" deleted by Shashi Kiran4/India/IBM] [attachment "Screen Shot 2016-01-15 at 10.50.33 AM.png" deleted by Shashi Kiran4/India/IBM] [attachment "Screen Shot 2016-01-15 at 10.46.20 AM.png" deleted by Shashi Kiran4/India/IBM]


Shashi Kiran

Tuesday, January 12, 2016

How to determine widget type in Tivoli Dash User Interface.

Tivoli Monitoring User Interface (also called Dash) Offers a mechanism to add Tivoli widgets to the User Interface.

Widgets that can added are Gauge Widget, Analog, area/Bar/Line/Bubble/Column/List Chart amongst others.
 
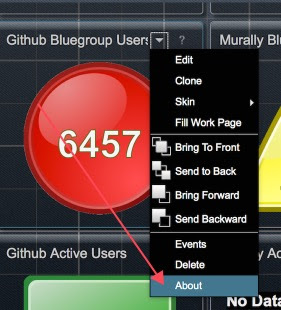
Here I will talk about how to determine existing widget types on a certain UI where an earlier user would have already created widgets, and you have to decipher what widgets was used.

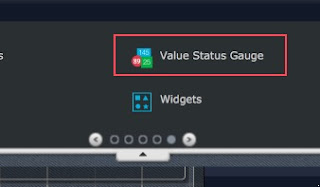
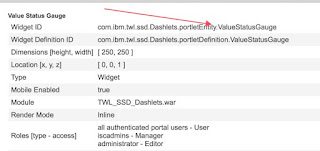
Take for example a Value Status Gauge was already added and named something else, which makes it hard -to find out when one tries to edit it.


Go to Edit mode in the UI, and Click on Widget and select "About"


Here it will tell the type of widget that was used -during creation - thereby giving you clues/leads to recreate it if required.


Thursday, January 7, 2016

IBM Bluemix - Real Time Insights.

In this blog - I will write about one of the IBM Bluemix Offerings for IoT called 'Real Time Insights'.

In this - one can track their devices and also set alerts, setup data sources ( i.e devices like Raspberry Pi ).

Here I will describe how I was able to get my Raspberry send data ( simulated temperature) to IBM IoT Foundation and also how to setup the IBM Real Time Insights to view pictorially
where the data is coming from ( or in other words ) where my Raspberry Pi is sending data from.

First, the Raspberry Pi has to be configured to the IBM IoTF ( for which you need an IBM Id - and you can create one for free ) .
http://console.ng.bluemix.net

Since, I have already covered how to configure the Raspberry Pi - my IoT device to IBM IoTF - I will skip that section and take you straight to the IBM Real Time Insights service setup and configuration.

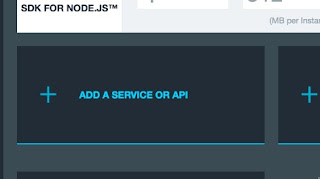
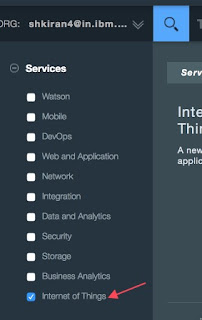
Open your IBM Bluemix Dashboard and then select your IoT Application that was used to create the IoT Foundation.
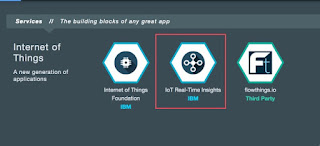
We will add this IBM RealTime Insights service to it.


Click on Create.


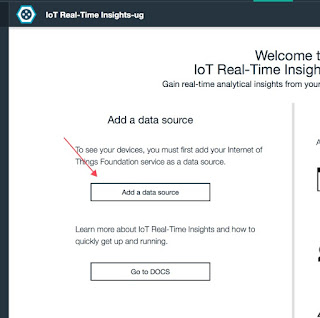
You should see the Bluemix RT Data source sign,
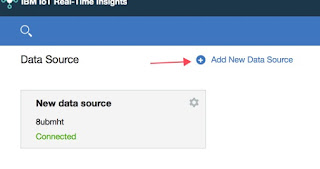
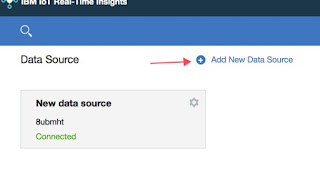
Add a new data source.

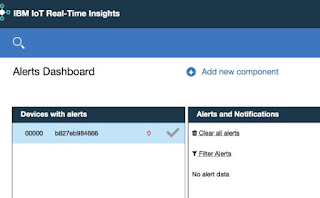
and if you have setup the data source correctly, you should be able to see this on your dashboard.